
How to Make a Fursuit Head and Mask: A Step-by-Step Guide
How to make a fursuit head out of foam: base, fitting, tape pattern, furring, eyes, ventilation, and shaving. Key stages and common mistakes.
- #DIY
- #head
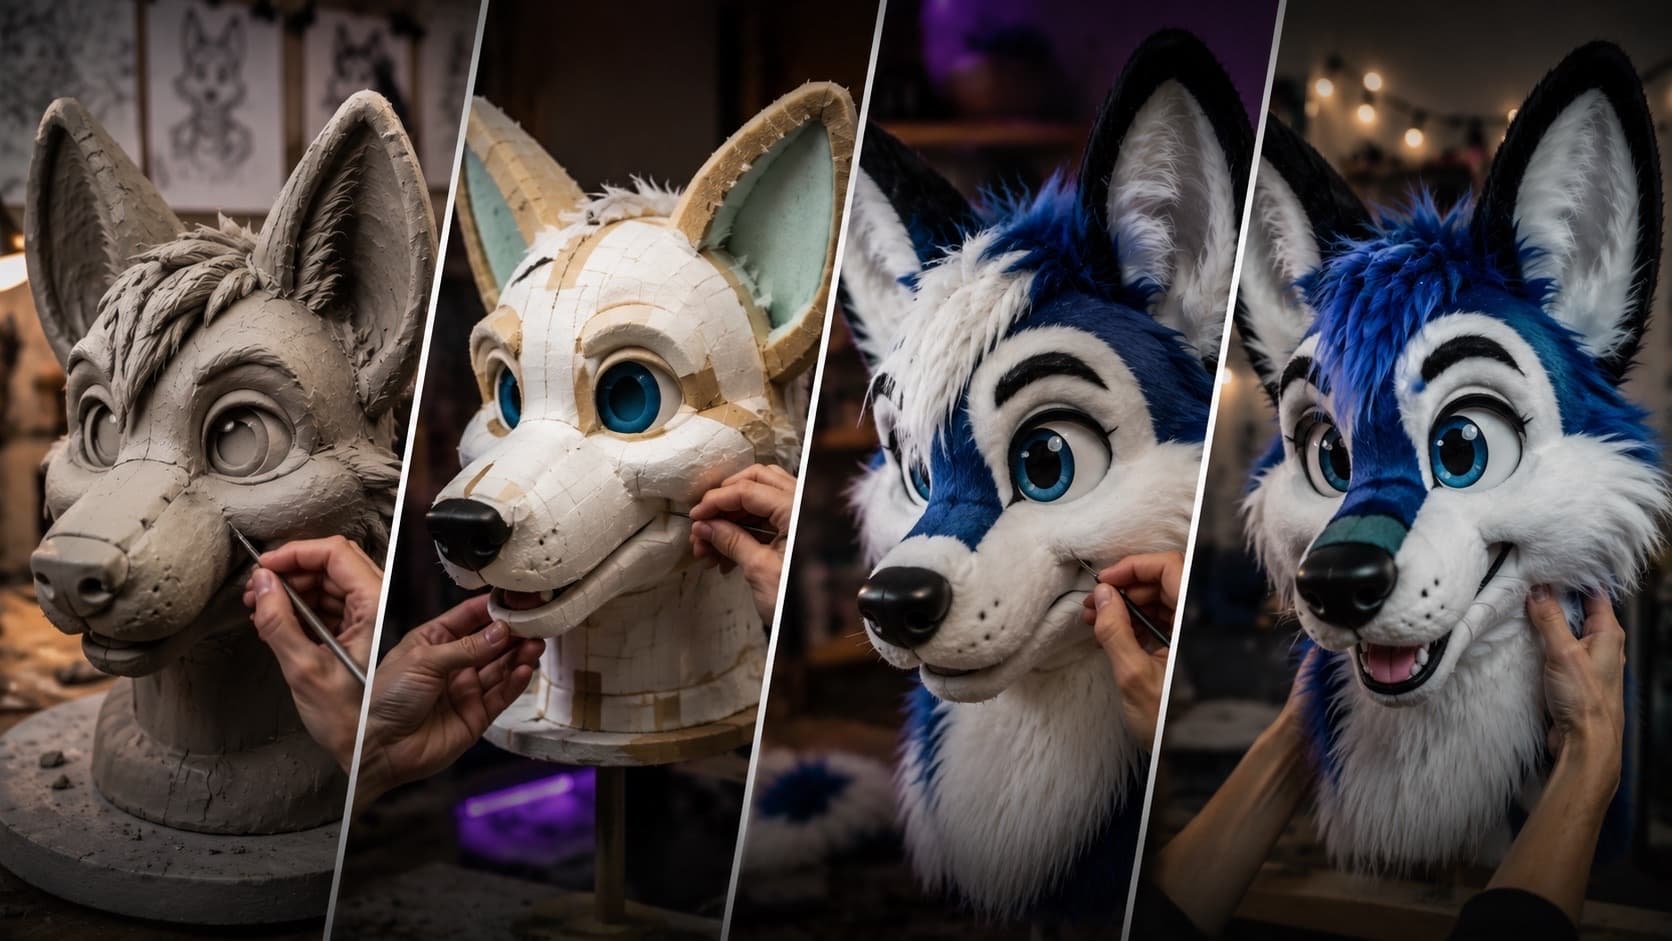
The Head — The Main Project
The head is the most expressive and labor-intensive part of the costume. It determines whether the character is recognizable, whether you can breathe and see comfortably, and how "alive" the costume looks. Therefore, crafting the head deserves more time than any other component. You can find a general overview of the process in the guide "How to Make a Fursuit"; this section focuses specifically on the head.
Step 1. Choose a base.
The base determines the weight and shape. Various options—foam, 3D printing, plastic, and papier-mâché—are discussed in the article "Fursuit Base". This guide focuses on the foam base: it is lightweight, easy to modify with a knife, and suitable for beginners.
Medium- and high-density polyurethane upholstery foam is most commonly used for these heads; it is lightweight and easy to cut. A softer grade is easier for a beginner to work with.
Step 2. Make the base.
- Determine the proportions. Sketch the muzzle from the front and side; estimate the size of the eyes, the distance between them, and the length of the muzzle.
- Cut out the foam blanks: the muzzle sections, skull, and cheeks.
- Glue the parts together. Contact adhesive is suitable for large joints, as it is strong yet flexible. Use hot glue for small parts and temporary attachments.
- Sand and round off the shape using scissors and a knife.
- Leave space for the face and neck. The head should be easy to put on and take off.
Cut the foam using sharp tools and apply the adhesive in a well-ventilated area.
Step 3. Test the base on yourself.
This is the most important step, yet many skip it. Before covering it with fur:
- wear the base for at least 10 minutes;
- check the line of sight: where the eyes will be positioned relative to your own;
- ensure the jaw doesn't dig into your chin or neck;
- check that the head sits level.
Adjustments at this stage take minutes; after covering it with fur, they take hours.
Step 4. Make the pattern.
Cover the base with masking tape, mark out the colors and fur grain direction, then cut the pieces and lay them out flat. A detailed description of the method can be found in the article "Fursuit Patterns". In brief:
- place seams where the curvature changes sharply: on the muzzle, chin, and brows;
- for a symmetrical head, a pattern for just one half is sufficient;
- mark alignment points at the seams;
- cut convex areas with darts, and split concave areas.
Step 5. Cutting and sewing the fur
Prepare the fur (how to choose):
- Check the fur grain before cutting: on the head, the fur should run backwards toward the neck.
- Transfer the pattern pieces onto the fur backing.
- Trim the fur beforehand — this makes it easier to work with thick areas.
- Cut only the backing, without cutting into the fur itself.
- Sew the pieces together: start with the darts, then join pieces of the same color.
- Leave some seams open: along the sides from the ears to the neck, between the ears, and around the nose and mouth. This makes gluing and fitting easier.
- Sew in a zipper at the back for adjustability, if desired.
Step 6. Covering the base
- Fit the fur over the base and secure it in place.
- Apply hot glue at points where the curvature changes: smile lines, cheekbones, ears, and cheeks. Use minimal glue to ensure the head remains breathable. It is best to make small incisions in the foam before gluing to improve adhesion.
- Sew up the remaining seams by hand, for example, using a blanket stitch.
- Attach the jaw fur to the inner mouth lining, and also join the nose to the fur.
Step 7. Eyes and Field of View
- Eyes: You can use ready-made ones or draw irises on white fabric—leaving the pupils semi-transparent for visibility—and glue the layers together to create a slightly convex shape.
- Visibility: Glue black mesh behind the eye opening; cut the mesh larger than the opening and stretch it taut—this is what you will look through.
- Check your field of view after gluing: move your head and walk around to ensure you can see steps and people nearby.
Step 8. Ventilation
Without airflow, the head quickly fogs up and overheats. Options include:
- leaving the mouth area partially open;
- installing a small fan aimed at the face;
- using both methods.
Address ventilation during the base-building stage; it is harder to incorporate later. In Protogen builds, fans are a standard part of the design.
Step 9. Details and finishing touches
- Nose, mouth, teeth, and tongue — made of plastic, silicone, or felt.
- Trimming. The final shape of the muzzle is achieved using clippers. Use an adjustable-length clipper setting and brush the fur frequently; finish by misting with a spray bottle and carefully trimming.
- Seams on the muzzle are concealed with felt strips around the nose and lips.
- Ears are attached with weight in mind; they are often built on a frame.
Common mistakes
- Didn’t test the base on yourself before fitting.
- Cut against the lint.
- Too much glue - the head can’t breathe.
- Poor visibility. The mesh and eye holes must be thought out in advance.
- Head is too heavy due to thick materials.
- Saving on fur and base.
Do it yourself or order it
The head is the most complex part; if you want a precise result, it is easier to order it from a professional maker: how it works. You can find prices in the Pricing section and examples in the portfolio. You can also craft some parts yourself and order the rest—just discuss this when submitting your order.
Questions and Answers
How long does it take to make the head? For a beginner, it takes weeks. Factor in time for test-fitting, adjustments, and corrections.
Which base is best for a first head? A foam base: it’s lightweight and easy to modify. You can compare materials in this article about bases.
How do I prevent the head from fogging up? Install a fan, leave part of the mouth area open, and ensure proper airflow right from the base-building stage.
Can I make the head without a sewing machine? Yes: some seams can be sewn by hand, while others can be glued. A machine simply speeds up the process.
Want a custom fursuit?
Tell us about your character — we will assess the project and name the timeline and price.